ViciVision Prima Simplifies Optical Measurement for Turned Parts
Appears in Print as:'Optical Measurement System for Turned Parts'
The company says it reduces programming learning time by 30%.
Edited byAngela Osborne
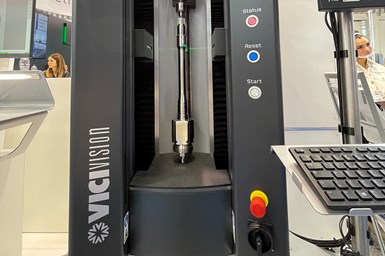
ViciVision’s Prima optical measurement series for turned parts is designed to transform part measurement by providing a more objective measurement system. Photo Credit: ViciVision
ViciVision’sPrima optical measurement series for turned parts is designed to simplifymeasurement. The company says it reduces programming learning time by 30%. It is also designed to transform part measurement by providing a more objective measurement system. The Prima optical measuring machines can streamline the process by simplifying steps, with no need for an operator manual. It features “Vivian,” a programming assistant to guide users step by step through the measurement process.
ViciVision also designs, manufactures and distributes a variety of other optical measuring machines for turned and ground parts. With these noncontact instruments, it is possible to take many measurements in a matter of seconds, such as static, geometric, thread, form or nut measurements.
The ViciVision M Series is designed for subcontracting and general turning. The M1 models are well suited to measure flank multi-spindle lathes or sliding head lathes, while M2 and M3 models work with small components to 900 × 140 mm.
The X series is specific for micromechanical components, watch parts and dental and biomedical screws.
The Techno series is designed for the automotive industry, including camshafts, turbines, constant velocity joints, transmission shafts, valves, pistons, crankshafts and more. It is a modular range that enables users to choose the most suitable measuring range between 20 different possibilities, starting with 300 × 40 mm up to 1,250 × 180 mm.
RELATED CONTENT
Measure Roundness, Roughness And Form With One Instrument
For those in the market for accurate and reliable roundness measuring instruments, here’s a line-up designed to offer the right balance of capability, automation and capacity for a range of applications and budgets.
Reducing Downtime With Tool Presetting
It’s an ongoing challenge. To remain competitive, shops must find new and more efficient ways to increase production. Often they look to new, faster and more precise machine tools as the answer. Sometimes experimentation with a variety of different tooling
To Scan or Not to Scan
Industrial metrology professionals are constantly tasked with finding the best methodology to inspect parts.


